Features
WOOD-LIKE SOFFIT
WIDE RANGE OF COLOURS
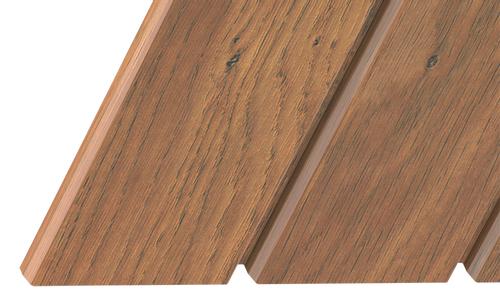
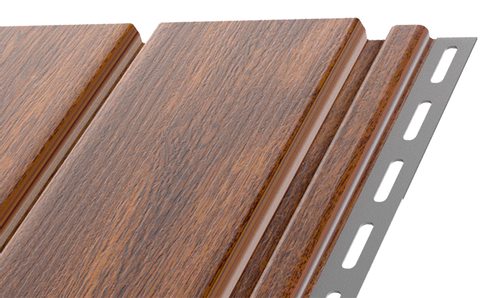
Wood-like soffit imitating the natural qualities of wood enjoys an exceptional recognition among customers. Thanks to a wide range of colours, you can easily create an aesthetically pleasing roof eave matching e.g. window and door joinery
WOOD TEXTURE
COLOUR CONSISTENCY
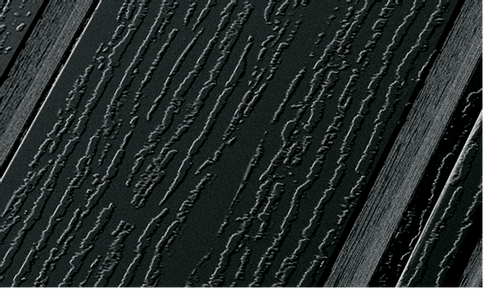
All the elements have a structure that perfectly imitates the natural qualities of wood. The range of colours of traditional soffit is consistent with the colours of BRYZA gutter systems.
ROOF VENTILATION
LOW WEIGHT
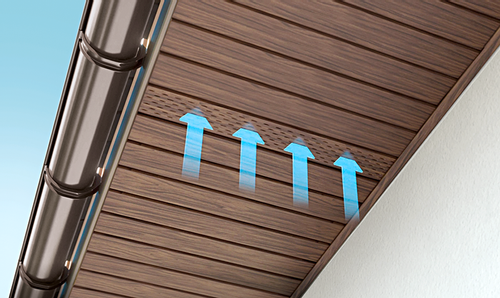
Effective ventilation of the roof slope is a very important element affecting the durability of the entire roof. Perforated panels perfectly fulfil this function. Thanks to the low weight of the system, it is possible to install it on delicate constructions without overloading the roof.
MAINTENANCE-FREE COLOUR FASTNESS
Elements made of maintenance-free material. Even after many years, the roof eave looks like new.
System elements
System
Colors
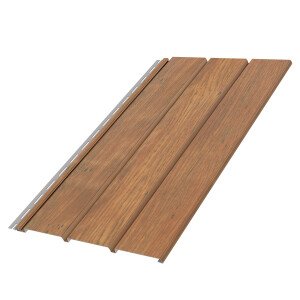
Solid ceiling board 3 m winchester
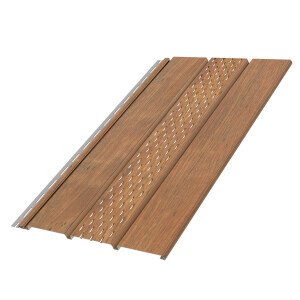
Perforated ceiling board 3 m winchester
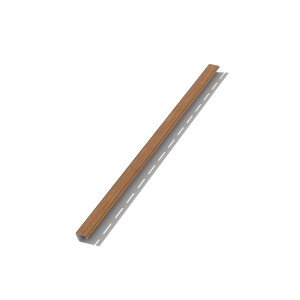
J-Strip 3 m winchester

assembly instructions
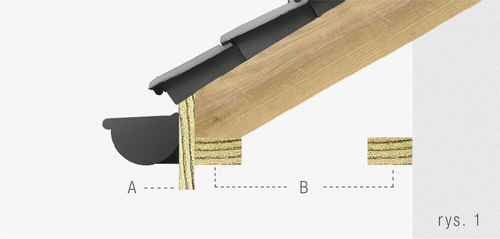
1INSTALLATION OF BRYZA PVC SOFFIT
EXAMPLES OF SUPPORTING STRUCTURES
A soffit should be mounted to a supporting structure made of dry impregnated wooden battens with the minimum dimensions of 25 x 50 mm. The structure should be properly levelled. The maximum spacing of battens should not exceed 40 cm. It is recommended that soffit boards should be mounted perpendicularly to the wall surface. The installation should be performed in the ambient temperature over 5°C. The BRYZA soffit should not be mounted in places exposed to direct sunlight. 5°C Minimum installation temperature A - face board B - wooden battens C - flashing D - J strip
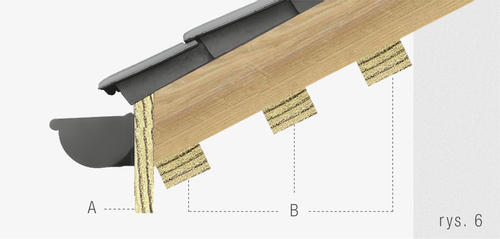
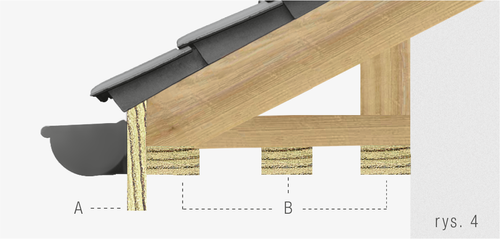
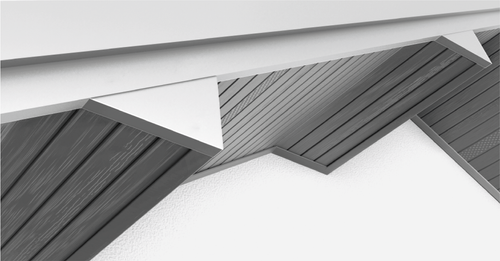
2EAVES PROTRUSION UP TO 40 CM
3EAVES PROTRUSION OVER 40 CM
4INSTALLATION OF A J STRIP
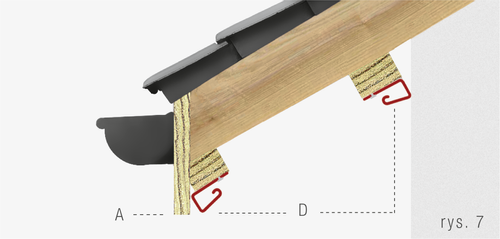
J strips are mounted on the perimeter of the built roof by fixing them to the battens with spacing of approximately 30 cm. One of the ends of the soffit board may be mounted to the properly formed front board flashing instead of a J strip (fig. 8).
5CONNECTING J STRIPS

6INSTALLATION OF SOFFIT ELEMENTS TO SUPPORTING STRUCTURE
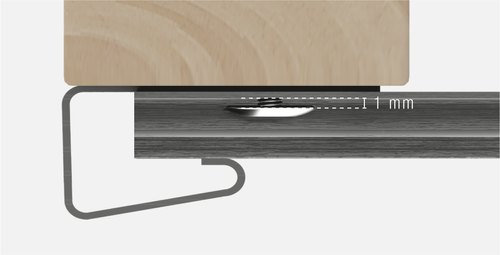
Soffit elements are mounted to a supporting structure by means of corrosion-protected screws (minimum length 20 mm and minimum head size 8 mm). The screws should be driven perpendicularly to the ground in the middle of mounting holes leaving around 1 mm clearance (in order to compensate for temperature-related length variations).
7INSTALLATION OF PERFORATED BOARDS
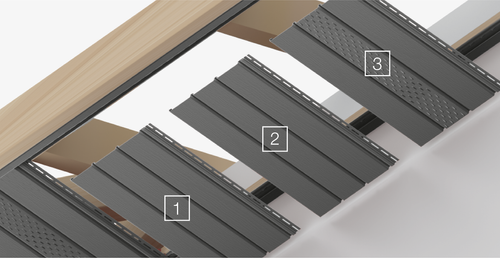
Perforated ceiling boards should be mounted as every third or every fourth panel in order to obtain proper ventilation of the roof.
8LOCATION OF H STRIPS
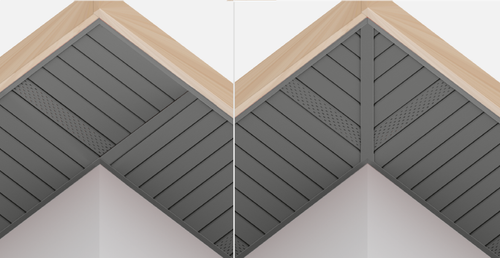
There are two methods of finishing a soffit in building corners, using H strips.
9CORNER STRIP - OUTER
The use of outer corner strip makes it possible to install the soffit to various types of roof structures. It is an element which allows for aesthetic finishing of the external edges of the roof soffit and the corners of protruding roof purlins.